


It's time to embrace the peer to peer exchange revolution.
This HOWTO assumes you already have Bison Wallet and DigiByte Core Desktop Wallet installed. If you do not, you can download them both from the links below.
Bison Wallet - Download
DigiByte Wallet - Download
NOTE: The Wallet versions used for this HOWTO are Bison Wallet (v1.0.0) and DigiByte Core Desktop Wallet (v7.17.3).
Configuring DigiByte Core Desktop Wallet
- Click on "Settings" at the top of your DigiByte Core Desktop Wallet
- Click on "Options"
- Click on "Open Configuration File"
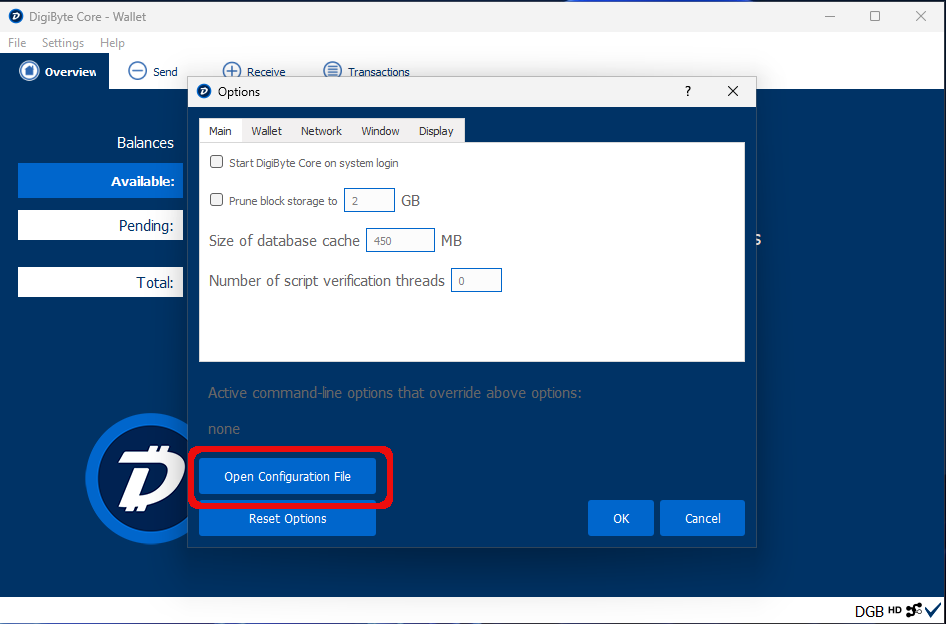
- Add the below lines to your digibyte.conf file.
server=1
rpcallowip=127.0.0.1
rpcuser=username_here
rpcpassword=password_here
- server=1 tells DigiByte wallet to accept JSON-RPC commands
- rpcallowip=127.0.0.1 tells DigiByte wallet to only accept RPC commands from 127.0.0.1
- rpcuser=username_here sets rpcuser to secure the JSON-RPC api.
- rpcpassword=password_here sets rpcpassword to secure the JSON-RPC api.
- Save your digibyte.conf file and restart the DigiByte Core Desktop Wallet in order to load your changes.
NOTE: Make sure your DigiByte wallet is completely synced before moving to the next step.
Configuring Bison Wallet
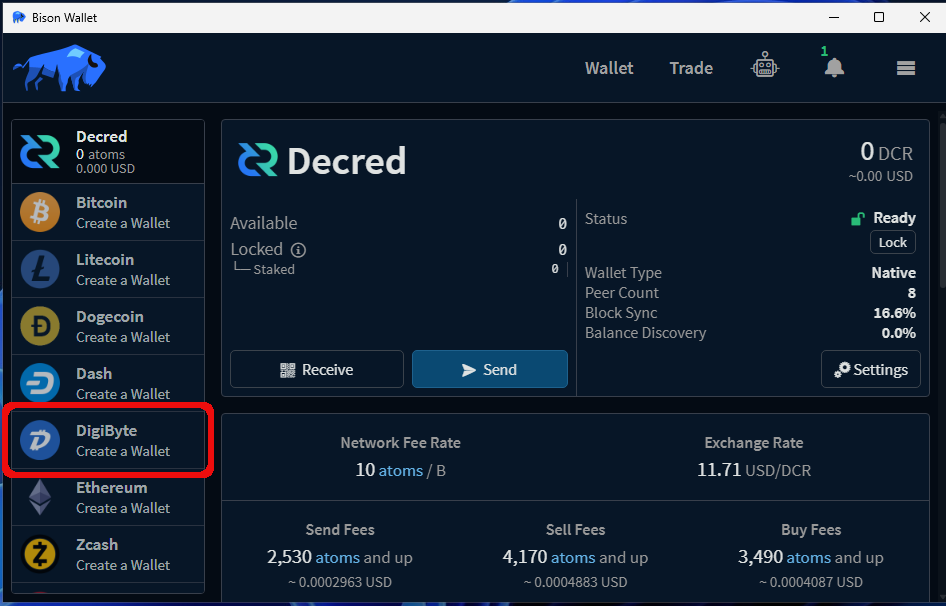
- In the left hand column, click "Digibyte Create a Wallet".
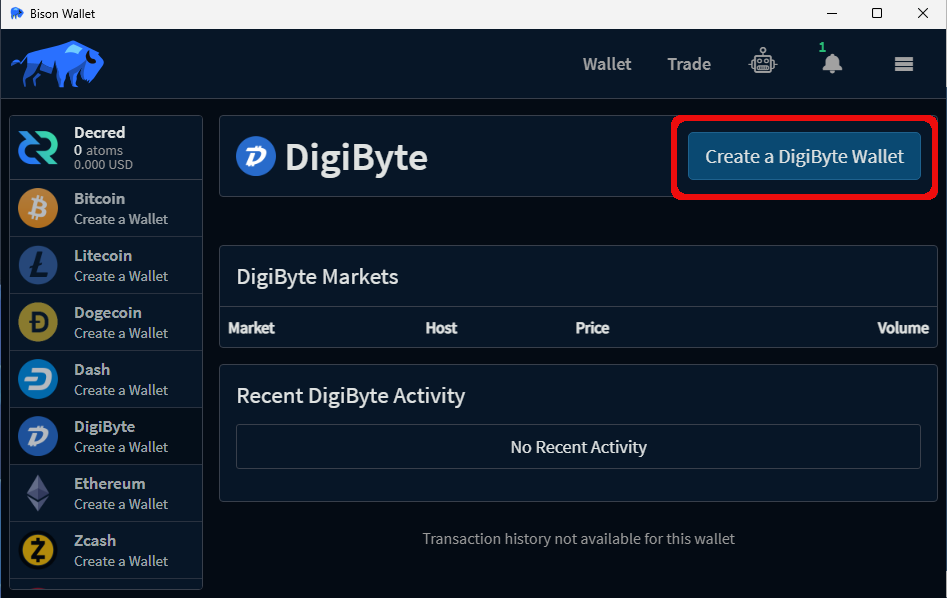
- On the next screen, click "Create a DigiByte Wallet"
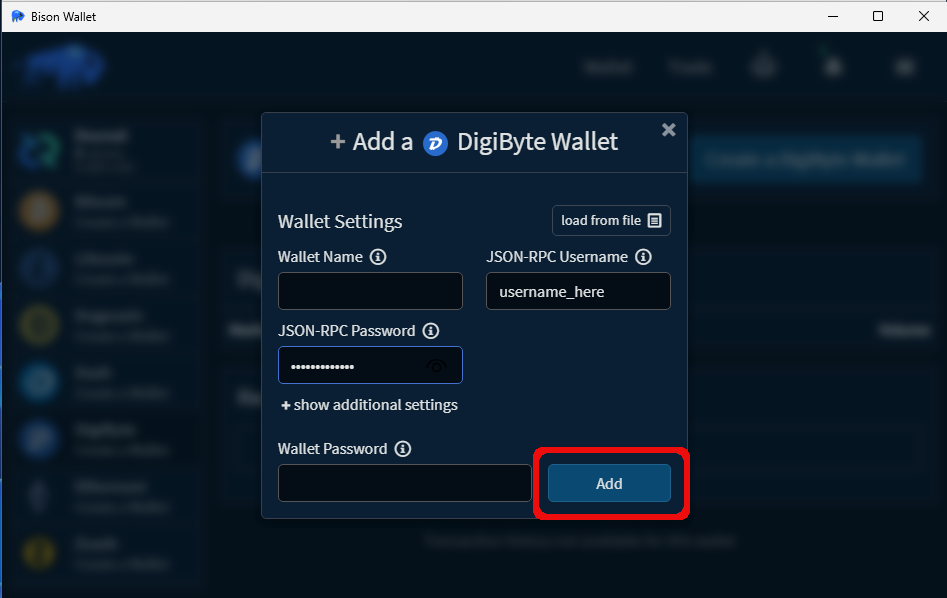
- On the next screen, fill in the details according to your digibyte.conf file configured above.
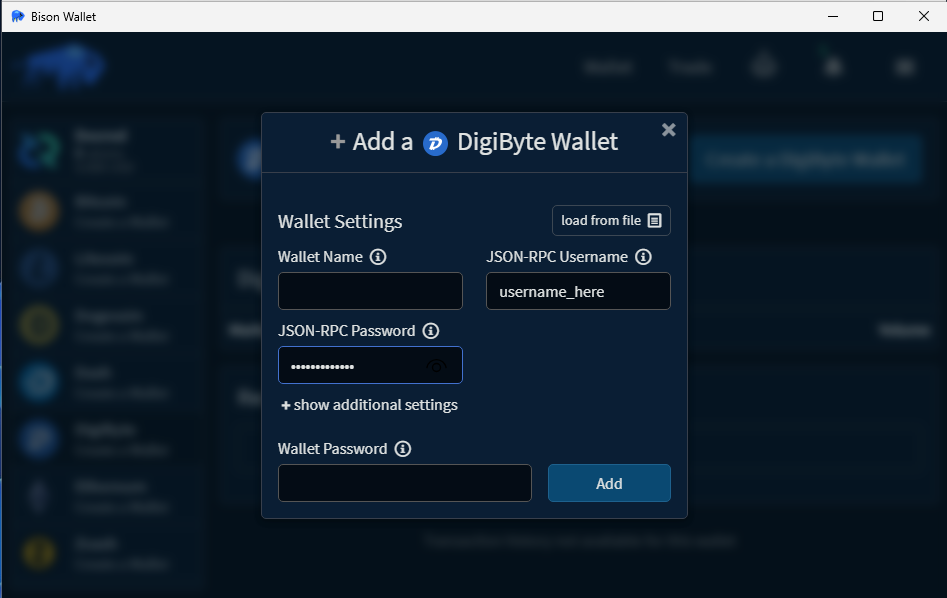
- Wallet Name: DigiByte Core (v7.17.3) does not support names. Leave blank.
- JSON-RPC Username: Enter here the rpcuser= entry in your digibyte.conf
- JASON-RPC Password: Enter here the rpcpassword= entry in your digibyte.conf
- Wallet Password: Enter here your DigiByte wallet password (If you used one).
- Click the "Add" button
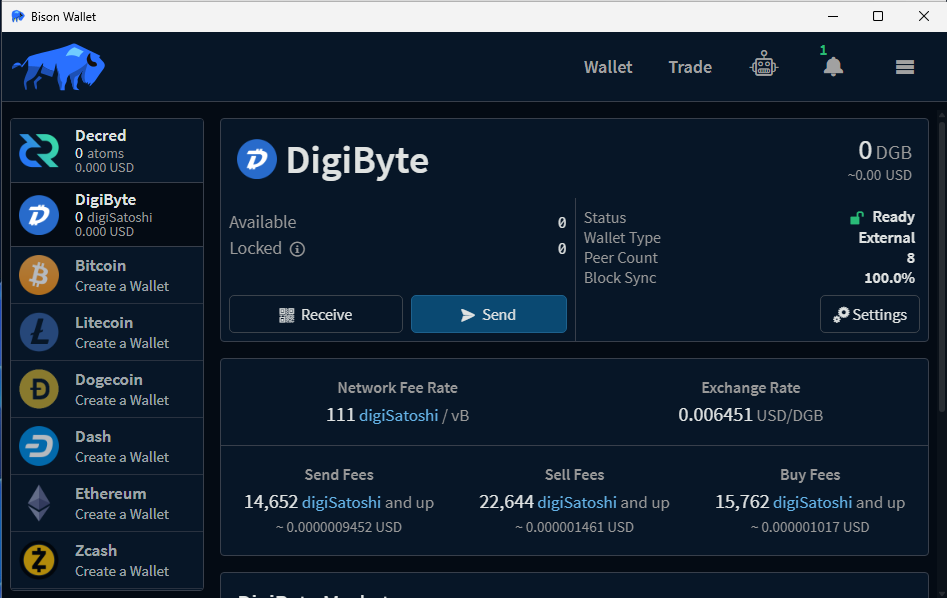
Congratulations! You have now successfully connected Bison Wallet to your DigiByte Core Desktop Wallet.


Comments ()